

How To A Clean A Wipe Clean Changing Pad
In high school, my band teacher drilled into my caput how important information technology is to keep my clarinet clean and would audit each instrument. Information technology wasn't until years later on that I fully understood why you should keep information technology clean and how to deep clean it. I'd similar to share that data now with yous.
 Your clarinet is a finely crafted instrument that needs proper cleaning to stay in top playing condition. Here are the x steps to properly clean your clarinet and then we'll get into each of these in more detail.
- Accept clarinet apart
- Make clean reed
- Make clean mouthpiece
- Swab each segment
- Bank check pads and tone holes
- Audit and oil keys
- Check joint corks
- Inspect trunk and apply diameter oil
- Wipe and smoothen exterior
- Clean case
As you lot can see, there'southward a lot that goes into deep cleaning a clarinet but we've broken information technology down into easy to follow steps and we'll explicate each step along the way. You'll exist surprised at how quick the whole process goes. Of course, the start time you do each of these steps, it'll take a little longer but you'll be a lot faster each time you deep make clean your clarinet.
Why you should make clean your clarinet
By cleaning your instrument, you're removing any buildup and possibly bacteria growth and mold. Over time, the moisture from your saliva and breath builds up and provides the perfect environment for leaner and mold to abound and thrive. Not only is that gross, it can smell icky, and tin get you sick over time.
The wet can too cause damage to your clarinet past changing the airflow inside your musical instrument, can increase the chances of a cleft forming, and can crusade the pads to non correctly. These tin all bear on how your instrument sounds.
The oils from your fingers tin cause discoloration and damage to your keys over time.
Over time, your clarinet just needs a little love to stay in top playing condition.
Yous should deep clean your clarinet monthly.
Tools and supplies needed
Before we get started, let'due south get all our tools and cleaning supplies together. Nosotros don't want to become into it and find out that we're missing something. If you run across anything that you're missing, you can observe them on our clarinet supplies page or can pick them up at your local musical musical instrument store.
Here'south what you'll demand:
 | Polishing cloth | 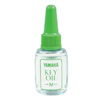 | Key oil |
 | Pull-through swab |  | Instrument sanitizer |
 | Mouthpiece brush | 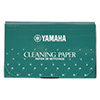 | Cleaning (pad) paper |
 | Key brush or baby toothbrush |  | Vinegar |
 | Modest screwdriver |  | Hydrogen peroxide |
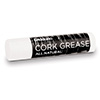 | Cork grease |  | Small container |
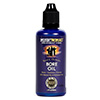 | Bore oil |
If you are missing any of these items, click on the links above or you can pay a visit to our clarinet supplies folio where you tin can notice more information, including kits to save coin. Or, yous can find the clarinet accessories at your local musical instrument shop.
Groovy, at present that you have everything ready, let's swoop into cleaning your clarinet!
Footstep i: Accept clarinet apart
This step seems obvious merely did you know you lot tin damage your clarinet if you dissemble information technology incorrectly? If y'all also much pressure on the keys, you tin bend them since the hinges and metalwork can be delicate.
Starting with the mouthpiece, gently twist equally you separate each department: the mouthpiece starting time, then the barrel, the upper joint, and finally the lower joint from the bong. With the mouthpiece, you'll want to loosen the ligature screws and then lift the ligature up over the reed. You can then remove the clarinet reed.
If you take any question on clarinet parts, please run into the Clarinet Anatomy section beneath.
Footstep 2: Clean reed
 Afterward loosening the ligature screws, y'all tin can remove the ligature and your reed. Audit your reed. Does information technology look clean or do you see spots or some other kind of buildup? If you do, you may have mold starting to abound on your reed and should sanitize information technology.
- In a small bowl, soak any reeds you've been using in a solution of half h2o and one-half either hydrogen peroxide or mouthwash. You can find either of these at your local department store or drug shop. Hydrogen peroxide is the aforementioned solution many people put on their cuts that'll bubble up when killing germs. You tin can also utilize mouthwash like Scope or Listerine, since information technology's an clarified that kills upwardly to 99.9% of germs. Mouthwash is normally preferable since it smells better.
- After soaking for ten-15 minutes, rinse the reeds off with cool water.
- Dry with a cotton or microfiber textile, starting at the base of operations going to the tip in one movement. This will wipe and dry the reed while being careful not to bit the tip.
- Permit reeds to air dry and so place back inside breathable reed cases.
Note: afterward you play each time, you should rinse your reed in clean water and then dry information technology with a textile. Also, by putting the mouthpiece cover on while non playing, you lot reed will be protected.
Step three: Make clean mouthpiece
 The mouthpiece is the dirtiest part of the clarinet. As you play, your saliva coats the within of your mouthpiece (chosen the bedchamber) where information technology can build upward and create an surroundings where bacteria and mold can thrive. This can be especially bad if you only ate or drank soda earlier playing since tiny food particles or sugars will be inside your saliva – extra food for bacteria. Considering of this, many clarinet players have had odor issues with their mouthpieces.
If you play regularly, your mouthpiece should be cleaned and sanitized weekly but is also an important step of this monthly deep clean.
- Grease the joint cork. To protect it from possible water damage over time, grease the cork to provide a bulwark while you soak it in the next step.
- In a small container, big enough for the mouthpiece, put together a solution of half water and half either vinegar or hydrogen peroxide. For the mouthpiece, I'd recommend vinegar considering information technology will break down limescale, that white chalky stuff that builds up over time. Identify your mouthpiece in this solution and let to soak for 5-ten minutes.
- Using a cardinal brush or baby toothbrush, remove any gunk that you lot can run across in the corners of the chamber. Both of these brushes are gentle enough to not cause scratches merely will practice the chore.
- Rinse and audit. If you see any spots that y'all missed, you can use a cotton swab (aye, like Q-tips for ears) to get the catchy spots.
- Sanitize your mouthpiece with either mouthwash or Sterisol. You can either soak your mouthpiece in these, or to use less, cascade the mouthwash or Sterisol over and downward into the sleeping room so that everything gets saturated. There'south also a spray version of Sterisol that works great.
- Using a soft cloth or paper towel, wipe everything dry out. Allow to air dry for a scrap.
Step 4: Swab each segment
 The swab is a cleaning fabric with a cord or string on ane end so y'all can pull it through each clarinet segment, except for the mouthpiece since you already cleaned that. Also though, you shouldn't swab the mouthpiece since it has a smaller opening and the cloth tin can get stuck and perhaps cause damage.
You lot may notice water inside the bore, or within, of each segment subsequently you lot have it apart. Some of this will be spit just most volition exist condensation from the warm air you've been blowing into the instrument meeting the cooler inner walls. That moisture if not removed, can cause mold, touch on how the clarinet plays and may even cause the wood to cleft over time.
First, make sure that the swab is spread out and non bunched upward or accept any knots in it. Then, with each segment, drop the string portion through the hole and and so pull the swab through. This will wipe and dry out at the aforementioned time. Do this for each piece until you don't meet whatsoever moisture or spots. You may desire to pick up any actress moisture that you run into on the keys while you're at it.
As you swab each segment, quickly inspect your barrel, both joints, and bong to brand sure that no small cracks are forming, or possible other issues. If you see annihilation that has you worried, schedule a visit with your musical instrument repair shop.
Step 5: Check pads and tone holes
 With this step, y'all'll remove moisture and buildup from your pads and check your seals.
To go rid of moisture from the pads, insert some cleaning newspaper in between the pad and tone hole. Press the primal lightly several times and repeat until no moisture or colour shows on the paper. Be careful non to pull out the newspaper while you lot're pressing downward on the key since information technology can damage the pad, or its seal. Regular white paper volition work for this also if you're in a pinch.
Next, nosotros'll need to bank check the pads for leaks. Over time, modest gaps tin form between the tone holes and the pads assuasive air to pass through. This can affect the tone of that fundamental and may make more piece of work for you since y'all have to blow harder.
To detect a leak, yous could play the scale and listen if you hear any notes that are a piddling off. Of course, you'd have to practise that earlier you accept your clarinet apart.
Equally you clean the moisture and buildup off with the newspaper (from above), y'all should get a circular impression the showtime time y'all insert the newspaper and press the key lightly a few times. If, later you remove the paper, you see that it'south an open circle, you lot may accept a leak where that circumvolve is open up.
Another examination is to cut off a thin slice of paper. A newspaper receipt or tobacco paper (for hand-rolled cigarettes) are both thin enough. Cut out a strip that's roughly 1/four inch broad and 3 inches long. With this sparse paper slice, put it nether the outside edge of the tone hole. Lightly printing the key and lightly pull on the paper. If it comes out hands, you've found the leaky pad.
Now that you've found the leaky pad, it may be fourth dimension to service your clarinet with an instrument repair professional. A skilful pad set should last 10 years but tin wear out quicker if exposed to besides much wet.
If yous run into any dust or other matter in your tone holes, you tin can remove them with your key castor or a cotton fiber swab.
Cleaning Pace 6: Inspect and oil keys
In this step, we want to brand sure that all keys are working correctly. Work each key to make sure the hinges are moving smoothly. Also check for any dents or aptitude metalwork. With your key brush (or cotton fiber swab), clean off any moisture or other residues from each key. If you lot take anything that'southward more than persistent, you can dip a cotton swab in a picayune vinegar to help loosen information technology up.
For areas under the metalwork that you can't get to, use your fundamental brush to remove dirt. You tin can as well remove any rods or keys to get to those areas.
Adjacent, check each screw and tighten as needed. These may loosen on their own over time.
At present utilise a little key oil to the pocket-size gap between the brawl and the hinge for each key. The oil will spread out on its own to lubricate the moving parts and provide an invisible barrier against the air and moisture. This volition also protect your keys against corrosion and terminate whatsoever sounds the hinges may have been making. For a clarinet, you'll want to use an 'M' oil (for medium).
Wipe off whatsoever excess oil with a paper towel or cleaning cloth.
Cleaning Step 7: Check joint corks
 At each segment articulation, in that location's a ring of cork that makes it easy to put your clarinet together and seals it for proper airflow. Over fourth dimension, the cork tin dry out or interruption down. This can arrive difficult to have apart your clarinet and if the cork becomes breakable and breaks off, can impact the sound of your instrument.
By applying cork grease every bit needed, the joint corks are protected and makes it easy to take autonomously your clarinet. More often than not speaking, you lot'll want to grease your joint corks twice a week if you're playing ofttimes.
Start off by applying a a few dabs of cork grease straight on the cork. Then, with your finger, polish information technology out so it'southward applied evenly all the mode around that cork seal. Yous don't need a lot, merely enough to cover the cork. If you lot use besides much, it'll just brand a mess.
Do this for all clarinet corks – for the mouthpiece, both ends of the upper joint, and the lesser of the lower joint.
If you go a petty overboard, only wipe off any backlog.
If you don't have any cork grease, you can utilize lanolin – many swear by it. There's other alternatives to cork grease too. However, don't use lip balm.
Cleaning Pace 8: Inspect torso and utilise bore oil
For the upper joint, lower joint, and bell, you lot'll want to inspect each slice and then utilize bore oil as needed to give the wood within the clarinet a protective finish. Follow these steps:
- Starting with the upper joint, hold it up to the light to encounter if there'southward whatever light reflecting, or wetness. If the diameter or tenon is dry out, you'll need to utilize bore oil. Equally yous're looking for dryness, also inspect for any cracking. Cracks offset small and can be remedied if caught quickly.
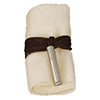
- With a pull-through swab that'southward dry and clean, utilize a few drops of bore oil most the string (this is where having a second swab comes in handy).
- Pull the string through and pull the cloth through, twisting information technology along the fashion. This twisting movement will more than evenly distribute the oil.
- Without applying any more oil to the swab, pull it through ii more times, again with the twisting movement. This should provide a protective finish throughout for the wood.
- Let the upper joint to sit for a few hours.
- Afterward that expect, inspect it again and if you lot don't meet wetness inside the bore, that ways that the woods soaked information technology all upward and it'll need another application. So echo the process with a few more drops of oil and pulling the swab through.
- Wait another couple of hours and if you lot encounter wetness within the bore this time, the wood has saturated as much as information technology can. With a dry swab, pull the fabric through a few times to pick upward any excess oil.
Do this for the upper articulation, the lower joint and the bell.
Cleaning Stride nine: Wipe and polish exterior
 Wiping and polishing the body and metalwork isn't just about making your clarinet shine and look its best. Information technology's as well well-nigh protecting your instrument.
Wipe downwards all the trunk and keys with a smoothen fabric to become rid of any dust, wet, or oils from your fingers. These will all add a little wear to your instrument over time. Ordinarily the keys are nickel-plated and then you lot tin apply the same cloth merely if your keys are argent, you'll want to use a dissever silver polishing fabric instead.
Equally you polish the keys, make sure to exit the pads alone. You don't want to disturb them.
Cleaning Stride 10: Clean case
After you've done such a smashing chore cleaning your clarinet, you don't want to put it back into a dirty instance. Your case needs to be cleaned out from time to time too and you might as well do it while you're cleaning your clarinet.
Remove any garbage, onetime reeds, telephone numbers (nice job, you!) etc. Also remove items that you want to go on in the case – merely set them aside. With the instance open milk shake it upside down over the garbage or outside to get rid of any complimentary dirt or lint.
Adjacent, apply a vacuum on anything notwithstanding left in the case. A lint roller tin also work to option upward specks from the velvet interior.
At present that it's looking pretty tip-top, put the case contents including the clarinet back into the example and close it upward.
A quick wipe down on the outside of the case is a nice affect to finish upward the whole procedure.
You've finished deep cleaning your clarinet. Doesn't that experience great?
Did yous find whatsoever bug?
Every bit you lot've cleaned your clarinet from pinnacle to bottom, you lot may have spotted some issues with your instrument. If you lot've spotted whatever of these issues, you'll want to pay a visit to your local musical musical instrument repair shop.
- Pads not sealing correctly
- Pads demand to exist replaced
- Crack in body or bell
- Demand new reeds
- Metalwork or hinges damaged
Tips for cleaning your clarinet and maintenance
Hither's a few additional tips that you may find useful.
- For cleaning the mouthpiece, instead of using a mouthpiece brush, a babe toothbrush works just as well since the bristles are softer than regular toothbrushes.
- When buying cleaning products, buy a kit that includes several products rather than individual supplies. Yous'll save money.
- It's recommended to have two pull-through swabs. That way you'll have a support when if y'all're washing one. Or, when yous're applying bore oil.
- Except for the mouthpiece, don't ever launder any part of the clarinet with water since it can damage your musical instrument and can crusade mildew.
- Never exit the reed on the mouthpiece. The reed won't be able to properly air out and may warp.
- Have care when storing your clarinet and when traveling. Even though your musical instrument is in its case, information technology can nevertheless be damaged by heat and moisture depending on where it's stored. When driving, be mindful that the trunk can get hot. If you need a new instance, check out our clarinet gear folio – we take a few recommendations.
Additional Info
Where to buy cleaning products
If you're missing any cleaning supplies or accessories, visit our clarinet production page. We've researched all the all-time cleaning supplies so y'all tin can cut through the crap and know you're getting quality gear for your clarinet.
Clarinet Cleaning Supplies
You tin can also purchase cleaning supplies at your local musical musical instrument store.
Here's some other useful manufactures that you may desire to read:
- The Cost To Clean Your Clarinet: Professional or DIY?
- How Often Should You Clean Your Clarinet? What If You Don't?
- Cleaning Your Clarinet Mouthpiece: Full Cleaning In Nether xx Minutes
Clarinet anatomy
Honestly, I played for years without knowing the names for each function of the clarinet so this section is a handy reference and so you'll have that data.

In closing
We promise you found this guide useful and that it'll make information technology easier to make clean and maintain your clarinet, so you can enjoy information technology for years to come up. Happy playing!
PS, please share this guide with others…it's a good thanks to us and we'll really appreciate information technology.

Source: https://cleanmyinstrument.com/clarinet-deep-cleaning/
Posted by: boxainge1980.blogspot.com
0 Response to "How To A Clean A Wipe Clean Changing Pad"
Post a Comment